

Good communication makes everything easier, especially when you’re writing to patients or other medical practitioners. To help you get started quickly, the system includes a range of Accounting templates you can use straight away. They’re there to save you time and make sure everything looks consistent and professional.
If you’d like something more tailored, we’ve made it simple for you to create your own templates, even adding your logo. By customising headers, footers and other elements, you can design each template to suit your style and include the info you need every time. This guide walks you through what’s available and how to build templates that work for you.
Looking for help? You’ll find everything here – read through it all, or use the index below to jump straight to what you need.
Your templates
After logging into ePractice, click the Documents icon in the left-hand menu.

This will open with the Documents queue at the top – click Correspondence templates in the top menu.
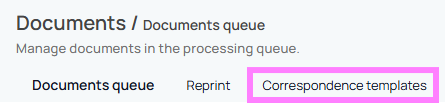
There are three sections:
- Templates
- Headers
- Footers
The templates are made up of a header, a main content section and a footer. The potential of having multiple headers and footers means you’ll have a template to suit all eventualities at a click of a button. Until you’ve created your personal templates, all three sections will show “0”.

System accounting templates
We’ve included a range of templates to get you started – these are very generic in nature although you can take them and create your own versions. For example, you could have a template for the whole practice and then different ones for each practitioner.
- Standard Invoice
- Standard Payment Receipt
- Standard Statement
- Standard Shortfall
- Credit Note
- Standard Band 2
- Standard Band 3
- Standard Band 4
- Standard Allocation of Debt
To make any changes just click the eye icon that appears when you hover over the template.
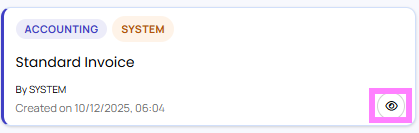
Toggle on the Edit template button at the bottom of the screen, which’ll open the menu on the left side.
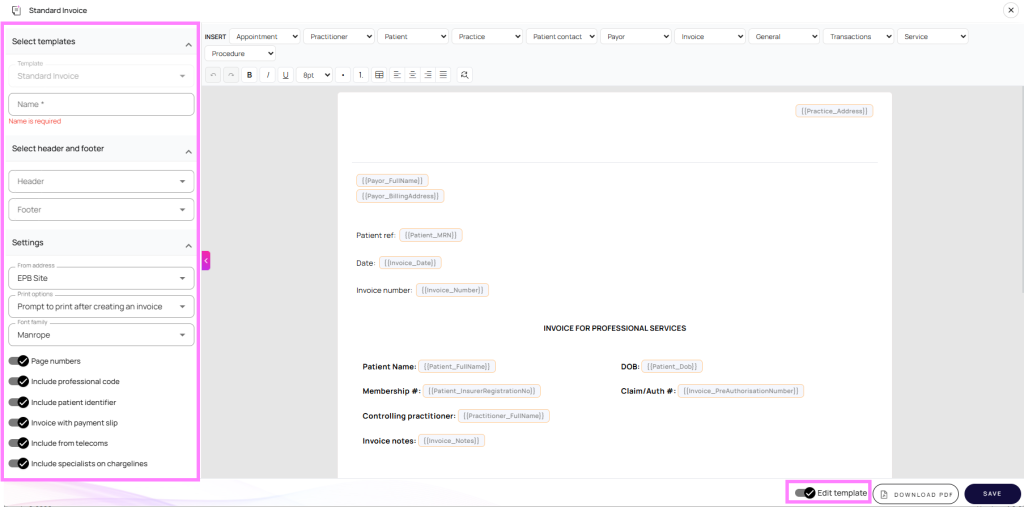
- Name – give your template a new name – you won’t be able to save any changes unless you do
- Header – if you’ve created a header you can choose to add it from the drop-down menu
- Footer – if you’ve created a footer you can choose to add it from the drop-down menu
- From address – choose from the options available
- Print options – choose from:
- Prompt to print after creating an invoice
- Always print after creating an invoice
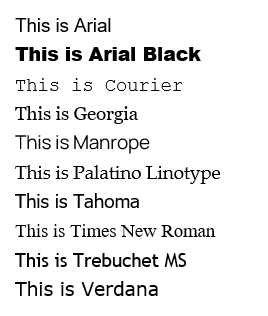
- Font family – choose from:
- Arial
- Arial Black
- Courier
- Georgia
- Manrope
- Palatino Linotype
- Tahoma
- Times New Roman
- Trebuchet MS
- Verdana
- Toggle off any of the parameters you don’t want
- Make changes to the document by amending, adding or deleting any of the text Note: the standard shortcuts of Ctrl+C and Ctrl+X will copy and cut text, but use Ctrl+Shift+V to paste
- Add any required fields – see the info on field options
- The formatting can be altered by using the available options:
- Undo
- Redo
- Bold
- Italics
- Underline
- Font size
- Insert bulleted list
- Insert numbered list
- Insert table
- Align text to the left
- Align text in the centre
- Align text to the right
- Fully justify test
- Find and replace
- Click Save and then Yes to confirm
Note: You can’t delete a template once you’ve named and saved it.
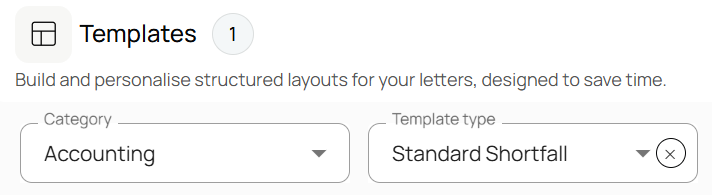
As you have now added your own template, the indicator next to Templates will now read 1 – this’ll increase as you add more.

To find your new template click the downward arrow next to Templates, scroll to the bottom of the system list and you’ll find it in the section marked Custom templates.
At the top of the section, you can also find what you’re looking for by typing a part of the template name in the Search templates field on the right or use the filter buttons on the left. For example, if you created your own Standard Shortfall template, choose Accounting from the Category filter and Standard Shortfall from the Template type filter. This’ll bring up system version at the top and your version(s) in the Custom templates section. Toggling on the Include inactive button will include all the templates that you have previously hidden by making them inactive.
Field options
These pull info directly from the system to fill important details for you. Think of them as smart placeholders – you add them to the template where you want the data to appear and these will automatically populate when you use the it. The fields will update every time, based on the patient record you’re working with, so you only design the template once and the system handles the rest.

Your available options:
- Appointment
- Start date
- Start time
- End time
- Location
- Service name
- Video consultation url
- Practitioner
- Full name
- First name
- Last name
- Title
- Phone
- Address
- Signature
- Patient
- Full name
- First name
- Last name
- Title
- DOB
- Age
- ID
- MRN
- Gender
- Phone
- Billing address
- Primary address
- Insurer name
- Insurer registration no
- Insurer address
- Shipping address
- Practice
- Name
- Address
- Phone
- Website
- Payee provider
- Patient contact
- Full name
- First name
- Last name
- Title
- Phone
- Primary address
- Billing address
- Relationship
- Address
- Payor
- Full name
- First name
- Last name
- Title
- Phone
- Primary address
- Billing address
- Address
- Insurer membership number
- Invoice
- Number
- Date
- Pre-authorisation number
- Notes
- Service date
- Service description
- Service setting
- Service fee
- Amount paid
- Amount due
- Net total
- General
- Document reference
- Today’s date
- Transactions
- Statement item date
- Statement item description
- Statement item credit
- Statement item debit
- Statement item running balance
- Payor outstanding amount
- Payor reallocated amount
- Transaction date
- Transaction amount
- Transaction method
- Credit note reason
- Payor full name
- Payor first name
- Payor last name
- Payor title
- Payor email
- Payor phone
- Payor primary address
- Payor billing address
- Payor address
- Service
- Specialist full name
- Specialist title
- Specialist first name
- Specialist last name
- Procedure
- Code
- Description
System user defined templates
We’ve given you two other non-accounting templates to start you off – a GP Letter that includes the patient details field options and a User Defined Letter that has minimal field options. You can edit and save these in the same way as the Accounting templates.
Adding a template from scratch
You can create templates that don’t use the system templates as a starting point. Simply click Add at the end of the Template section and then either click Accounting or User defined.
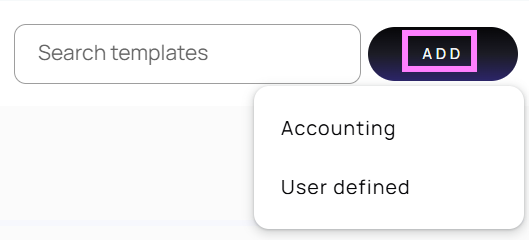
Whichever one you pick you’ll then need to choose the overall template your new one will be based on. The steps are the same as listed above for the system accounting templates, except you won’t need to toggle on the Edit button first. Remember to give each new template a unique and obvious name so you’ll be able to easily find it in future.
Note: You can’t delete a template once you’ve named and saved it.
Editing, cloning and marking your templates as inactive
Once you’ve created your personal templates, you may well need to make adjustments to them in the future or perhaps you’d like to reuse a specific template layout for another purpose. This is easy.
When you hover over any of your personal templates, three icons will appear:

- Toggle off the button to mark the template as inactive – this is the only way to remove it from your visible list as you can’t delete it – you can toggle on the Include inactive button if you need to find it in the future
- Click the pencil icon to make changes to the template
Your headers and footers
Now you’ve created the templates to suit the way you want to work, you can add headers and footers to continue that personalisation. Setting up for both works in the same way and is super easy.
- Click Add at the end of the Headers or Footers section
- Give it a unique name that will be obvious to you and the team
- Add the text you want to use, including inserting a logo or other image
- Use the formatting options at the top of the screen
- Undo
- Redo
- Bold
- Italics
- Underline
- Font size
- Insert table
- Align text to the left
- Align text in the centre
- Align text to the right
- Fully justify test
- Insert an image
- Choose layout
- Default (full width)
- Two column
- Click Save
You can edit your headers and footers and mark them as inactive, but you can’t clone them.
If you need more help with Communication, you can sign up for a free 1-2-1 Healthcode Academy training session or get in touch with one of our friendly team.