

Electronic Patient Records (EPR) is your super‑smart patient story that keeps every detail, pathway and task in one place – fast, simple, seamless. The best bit? Less admin juggling means more time with your patients.
Looking for help? You’ll find everything here – read through it all, or use the index below to jump straight to what you need.
Patients
Contact database
- Adding a contact
- Adding contacts to a patient
- Editing a contact and viewing links
- Unlinking a contact
Clinical notes
Care pathways
Prescribing
- See our separate guide
Tasks
Adding a patient
Patients are managed directly from the dashboard, which is the default landing page when first accessing ePractice. If you’re anywhere else, simply click the Dashboard icon in the left-hand menu. By default, this menu is collapsed to only show the icons but hovering over each one gives you tooltips.

If you prefer, click on the hamburger menu at the top left of the screen to expand the menu, then click Dashboard.

- Click Add patient

- There are five sections to be completed and the overview section on the right of the screen will show your progress – the mandatory fields are marked with an asterisk (*):
- Demographics
- Address
- Telecoms
- Identifiers
- Settings
Demographics
- Title
- First name*
- Last name*
- Initials
- Date of birth – type this in or use the calendar button
- Gender*
- Ethnicity – choose from the drop-down options
- Languages known – click in the box and tick against the relevant ones, you can also type in the search box to avoid scrolling
Address
- Address type* – choose from the drop-down options
- Postcode – type this in first and click the correct address from the options displayed (the Address line 1, must be populated), making adjustments if necessary
- Prefix – this is useful if you need to add something before the address for any reason, e.g. FAO… or, if the patient is a child, The parents of/The legal guardian of…
- Billing – this is toggled on by default but can be toggled off if you know the patient won’t be responsible for their own invoices e.g. a child
Telecoms
- Telecom type – choose an option from the drop-down menu (e.g. Email), enter the details in the next field, then click Add to save it; repeat with other telecoms e.g. mobile
- Preferred contact – this will default to the first telecom you add; if you have more than one, choose which telecom contact should be the preferred method of getting in touch with the patient
- To edit a telecom, simply hover over it and click the pencil icon – you can now make the necessary changes, including whether to keep it as the preferred method and click Update
- To delete a telecom, hover over it and click the dustbin icon – you can’t delete the primary contact so make sure you reassign this first
Identifiers
- Identifier Type – if you want to add an identifier to the patient, choose an option from the drop-down menu
- Value – type the identifier you want to use and click Add
Settings
These are toggled off by default.
- Don’t chase
- On stop
- Safeguarding
- Collection service paper only – slide the toggle to the right if the contact will be a payor but you want to send them a paper invoice, rather than an electronic one through Online Payments (patientzone integration)
- Once done, click Save on the bottom right of the screen
- The new patient will appear on your dashboard at the top of the Patients list
Editing basic patient details
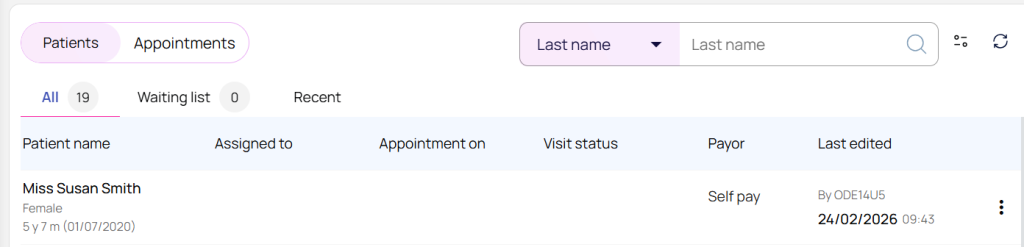
On the dashboard, click Patients to view your list and use the search box at the top to find the patient you want to edit using one of the drop-down options e.g. Last name. You have two options:
- For changes or additions to the patient’s demographics, identifiers or settings, click the three dots at the end of the row and then click Edit patient
- Make the changes or additions and click Update to save them
- For all other changes or additions and to link contacts and insurers, click the three dots and then click View patient
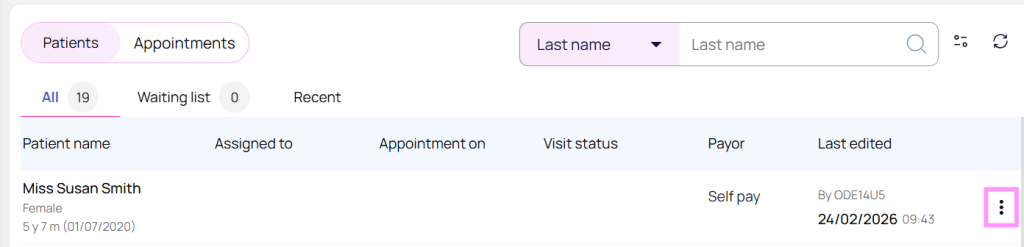
View patient options
Viewing a patient gives you access to their full EPR and, as a user, you can keep the full selection…
Available list in alphabetical order
- Accounts
- Allergies
- Appointments
- Clinical notes
- Contact details – this is the only constant and you can’t remove this from view
- Contacts
- Correspondence
- Insurer
- Medical history
- Medication list – only available if Prescribing is enabled
- Notes
- Tasks
…or choose which tabs appear by default – useful if you only want to focus on what matters to you. Click the three dots at the end of the tab list, untick any you don’t want to keep visible and then click Save.

Add, edit or delete addresses or telecoms
- Click Contact details from the tab list
- Any address or telecoms you saved when adding the patient are shown
- Click New address or New telecom to add more, changing the Primary address and adding the Billing indicators and also the Primary and Preferred telecoms indicators as required
Linking an insurer
- Click Insurer from the tab list
- Click Link insurer
- Enter details as required in the following fields – the only mandatory one is the name of the insurer:
- Insurer – choose from the drop-down options
- Membership number
- Scheme
- Expiry date – type this in or use the calendar button
- Click Save
If you add any more insurers, you can change which one is Primary, by clicking the pencil icon at the top of the relevant card. You can also remove an insurer by clicking the unlink icon.

Find Member
- Click Insurer from the tab list
- Next to the insurer card is the Find Member info and you can view the Service Limitations and Disclaimer by hovering over the words
- Click Verify now
- If Find Member is enabled for that insurer and a result is available, a pop up will open with all the details
- If these are the same as you already have you can click Close
- To update your records, either copy and paste the necessary details or click Update to overwrite your details.
Adding a contact
When adding a patient to your database it’s important to know the people responsible for paying any invoices you raise. You can send electronic invoices to most of the insurers if you have recognition and a current subscription to the Clearing Service. Even if the patient is coming to you as a self-pay they may ask you to send the invoice to someone else – so you need to capture those details.
But contacts aren’t just for invoicing. They can be other practitioners involved in the patient’s treatment, embassies, next of kin or anyone else that you may need to contact. You can even add departments to organisations to add another layer of customisation. Some of these contacts will be unique and only linked to a single patient and others will be linked to multiple patients.
After logging into ePractice, click the Contacts icon in the left-hand menu.

By default, this menu is collapsed to only show the icons but hovering over each icon gives you tooltips. If you prefer, click on the hamburger menu at the top left of the screen to expand the menu.

Once you have a few contacts in your database, you can easily search using the alphabet at the top of the page, by typing in part of their name in the Filter by box or by using the contact type drop-down list.

- Click the + symbol at the top right of the screen and choose from the three options:
- Add organisation
- Add department
- Add person
Adding an organisation
- Click the + symbol at the top right of the screen and choose Add organisation from the drop-down options
- Enter details as required in the following fields and the overview section on the right of the screen will show your progress – the mandatory ones are marked with an asterisk (*):
- Name*
- Contact type* – select from the options in the drop-down menu or click the + symbol at the side of the box to add your own
- is Payor – slide the toggle to the right to indicate if you’ll be sending an invoice to this contact
- Collection service paper only – slide the toggle to the right if the contact will be a payor but you want to send them a paper invoice, rather than an electronic one through rather than an electronic one through Online Payments (patientzone integration)
- Type* – choose from the options in the drop-down menu
- Postcode – type this in first and click the correct address from the options displayed (the Address line 1, must be populated), making adjustments if necessary
- Select telecom* – choose an option from the drop-down menu (e.g. Email), enter the details in the Value* field, then click Add to save it; repeat with other telecoms e.g. mobile
- Primary – choose one of your telecom contacts to the primary point of contact – good if, for example, there’s a general phone number and another that goes directly to the department you’re dealing with
- Preferred – choose one of your telecom contacts to be the preferred method of getting in touch with the organisation
- To edit a telecom, simply hover over it and click the pencil icon – you can now make the necessary changes, including whether to keep it as the preferred method and click Update
- To delete a telecom, hover over it and click the dustbin icon – you can’t delete the primary contact so make sure you reassign this first
- Once done, click Save on the bottom right of the screen
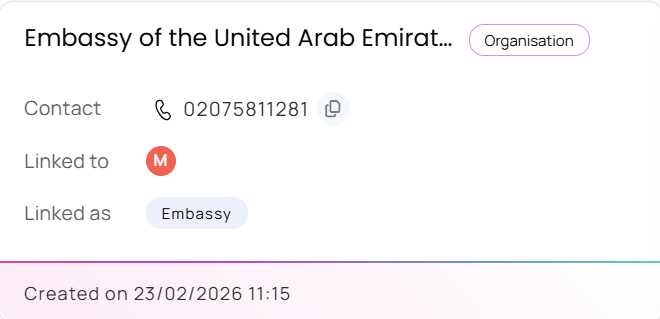
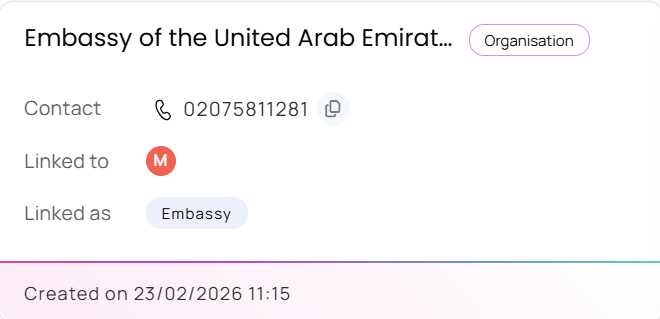
- A new contact card will be created in your database, featuring the primary telecom, a overarching tag of Organisation and the contact type added as a link
Adding a department
If you’ve previously added an organisation to your contacts database, you can add a department e.g. Medical Invoicing.
- Click the + symbol at the top right of the screen and choose Add department from the drop-down options
- Enter details as required in the following fields and the overview section on the right of the screen will show your progress – the mandatory ones are marked with an asterisk (*):
- Name
- Contact Type – select Department
- Organisation – choose the relevant one from the drop-down options; if you have quite a few already listed, imply start typing to find it
- Address – either type in the same postcode as the organisation and choose the address from the drop-down options (making adjustments as necessary) or type in a new postcode or address details if appropriate
- Select telecom* – create at least one, which is likely to be different from the parent organisation e.g. a direct dial telephone number or a named person email address and enter the details in the Value* field
- Once done, click Save on the bottom right of the screen
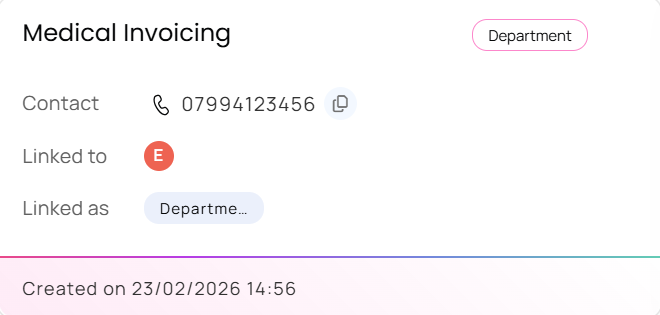
- This’ll create a new contact card in your database, featuring the primary telecom, two overarching tags of Department (the main one and the contact type) and the Linked to field is now populated with the organisation you just added it to; the same field in the Organisation card points to the new department
Adding a person
- Click the + symbol at the top right of the screen and choose Add person from the drop-down options
- Enter details as required in the following fields and the overview section on the right of the screen will show your progress – the mandatory ones are marked with an asterisk (*):
- Title*
- First name*
- Last name*
- Initials
- Job Title
- Qualifications
- Contact type* – select from the options in the drop-down menu or click the + symbol at the side of the box to add your own
- Organisation – if this person is linked to an organisation in your database you can choose it from the drop-down options; if you have quite a few organisations already listed, simply start typing to find it
- is Payor – slide the toggle to the right to indicate if you can send an invoice to this contact
- Collection service paper only – slide the toggle to the right if the contact will be a payor but you want to send them a paper invoice, rather than an electronic one through rather than an electronic one through Online Payments (patientzone integration)
- Type* – choose from the options in the drop-down menu
- Postcode – type this in first and click the correct address from the options displayed, making adjustments if necessary
- Select telecom* – choose an option from the drop-down menu (e.g. Email), enter the details then click Add to save it; repeat with other telecoms e.g. mobile
- Primary – choose one of your telecom contacts to the primary point of contact – good if, for example, there’s a general phone number and another that goes directly to the department you’re dealing with
- Preferred – choose one of your telecom contacts to be the preferred method of getting in touch with the organisation
- To edit a telecom, simply hover over it and click the pencil icon – you can now make the necessary changes, including whether to keep it as the preferred method and click Update
- To delete a telecom, hover over it and click the dustbin icon – you can’t delete the primary contact so make sure you reassign this first
- Once done, click Save on the bottom right of the screen
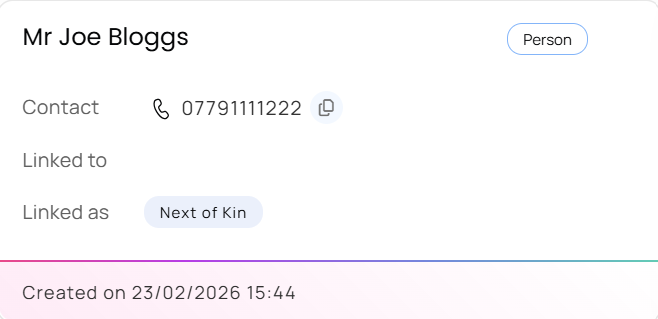
- A new contact card will be created in your database, featuring the primary telecom, a overarching tag of Person and the contact type added as a link
Adding contacts to a patient
This is done from the View patient screen, accessed from the Dashboard.
- Click Patients to open your patient list and use the search box at the top to find the patient you want to edit, using one of the drop-down options e.g. Last name
- Click the three dots at the end of the patient’s row, then select View patient
- Click Contacts from the tab list
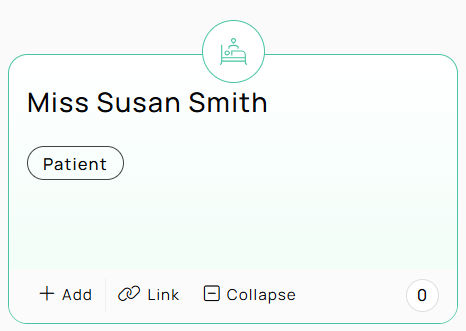
- On the patient’s contact card (which’ll show “0” in the bottom right corner until someone is linked), choose one of these options, depending on what you want to do
Add a new contact specific to this patient
- Click +Add and choose what type of contact you want to create (Organisation, Department or Person)
- Complete all the details – the mandatory fields are marked with an asterisk (*)
- Select the relevant Contact type – you can choose more than one e.g. Next of Kin and Mother
- Choose one Contact type option as the Link as option
Link an existing contact from the global list
- Click Link and choose the type of contact you want to link (Organisation, Department or Person)
- Use the drop-down list to search for and select the correct contact
- Choose the Contact type from the drop-down menu
- Slide the toggle to the right if you want to mark this as the primary link
- Click Save
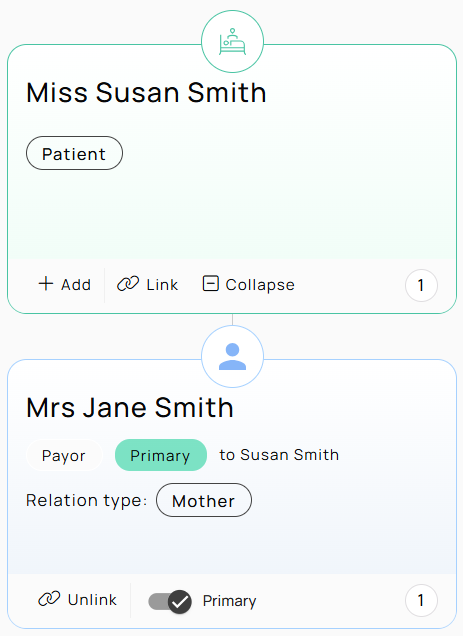
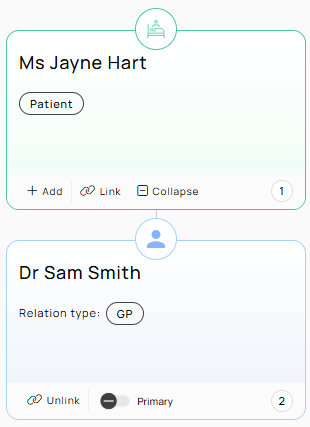
- A new contact card will appear underneath the patient’s card and the number in the bottom-right corner will update to reflect the new link
- The number in the bottom-right of the linked contact card shows how many patients the contact is linked to
Editing a contact and viewing links
Click the Contacts icon in the left-hand menu.

- Search using the alphabet at the top of the page, by typing in part of their name in the Filter by box or by using the contact type drop-down list
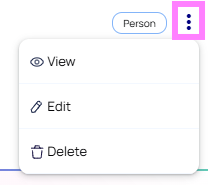
- Hover your mouse over the contact you want to edit or view and click on the three dots that appear in the top-right corner of the card
- Choose Edit to update any contact details and View to see who the contact is linked to
Editing
- Click Edit to open the details pane
- Make any required additions or changes
- Click Update
Viewing
- Click View
- The Family tree will open and you’ll see all the other contacts this one is linked to
- You can add new contacts from here and also unlink any that are no longer relevant
Unlinking a contact
It’s easy to remove a contact from a patient. As well as doing this directly from Contacts as shown above, you can also do this from the View patient screen, accessed from the Dashboard.
- Click Patients to open your patient list and use the search box at the top to find the patient you want to edit, using one of the drop-down options e.g. Last name
- Click the three dots at the end of the patient’s row, then select View patient
- Click Contacts from the tab list
- Click Unlink on the contact you want to remove
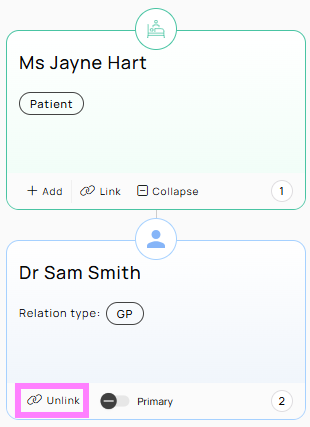
- Click Yes to confirm
Adding clinical notes during an appointment
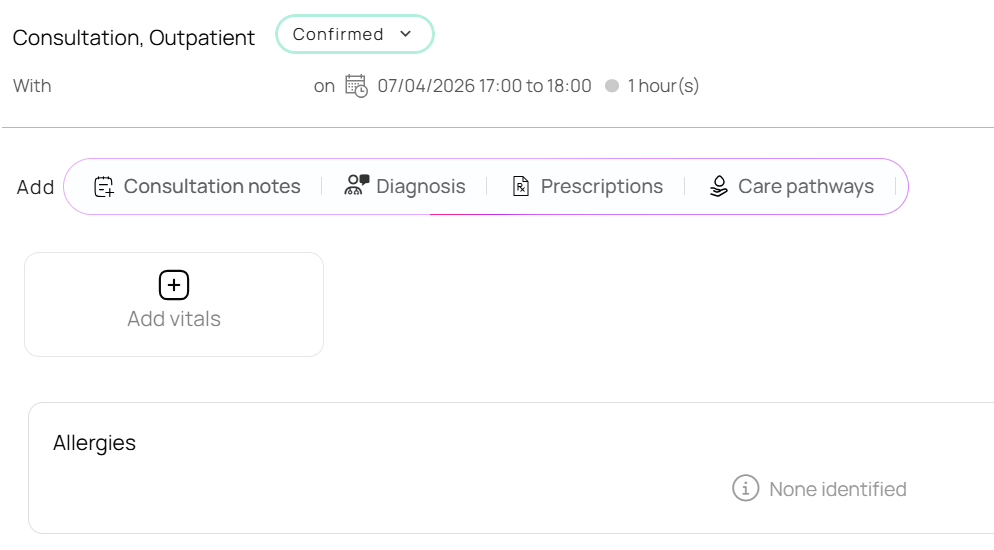
To help you capture the important details of what you’re seeing, discussing and deciding with your patients, you can add notes in real time. Doing this as you go keeps the record accurate, clear and up to date. During the appointment you can enter:
- Vital signs
- Allergies
- Consultation notes
- Diagnosis
- Prescriptions
- Other services (for invoicing purposes)
- Care pathways
At the start of the consultation you can get to the clinical notes section in one of three ways:
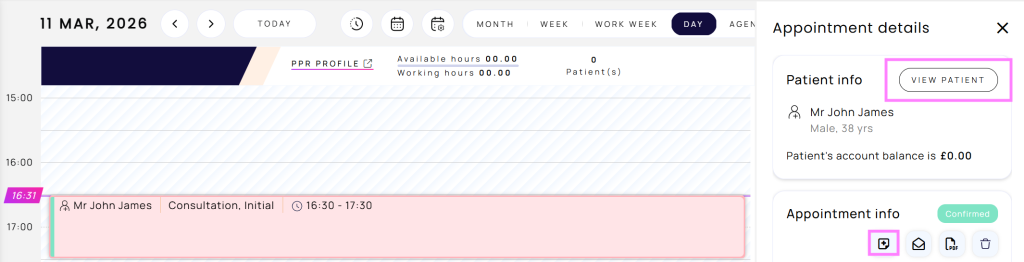
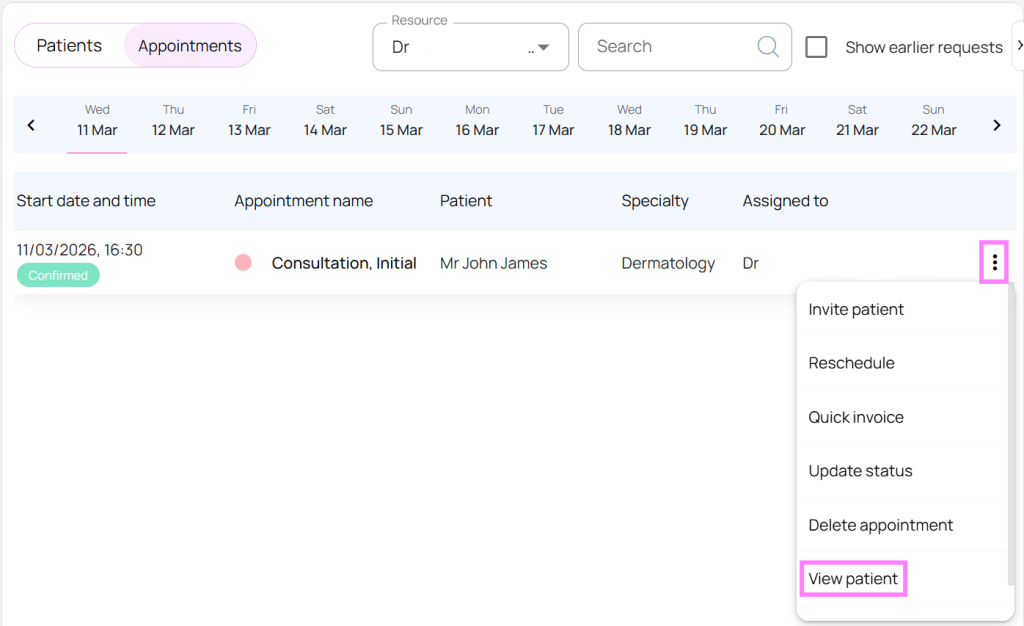
- Click the patient’s name on the diary, then either click View patient at the top of the right-hand pane or the Add clinical notes icon in the Appointment info section
- Click the three dots from the Dashboard > Appointments and then click View patient
- Depending on how you’ve set yourself up to view your patient records (see the section on Editing basic patient details) the Clinical notes section may be what you land on, or you may need to click it from the EPR selection to see all your options
Vital signs
- Click Add vitals
- Add the relevant options from a choice of
- Blood pressure
- Pulse
- Height in cm
- Weight in kg
- BMI (will automatically calculate this if height and weight are entered)
- Temperature
- Respirations
- Oxygen saturation
- Head circumference
- Waist
- Hip
- Neck circumference
- Click Save
Allergies
- Click the + sign in the right-hand corner of the Allergies card
- Complete the details (mandatory sections marked with *)
- Type* – choose from Allergy or Intolerance
- Allergen* – use the search box and choose from the options shown
- Severity* – choose from the following options, which are colour coded on viewing
- Fatal – purple
- Life-Threatening – red
- Mild – pink
- Moderate – yellow
- Severe – blue
- Notes
- Click Save
This section will be automatically populated for any future appointment and can be edited or deleted by clicking the pencil or bin icons.
Consultation notes
This is the main area for you to record all aspects of the patient’s medical problems, from taking family history and past medical details at the initial consultation, to assessing the presenting complaint and symptoms. You can also upload documents and images by using drag and drop or clicking Browse for file.
- Click Consultation notes from the Add option

- Enter # to display your options from a choice of:
- Additional notes
- Additional questions
- Assessemnt
- Chief complaint
- Diagnosis
- Family history
- Follow up
- History of present illness
- Image
- Instructions
- Past medical history
- Past medication
- Past surgical history
- Physical examination
- Plan
- Presenting complaint
- Review of systems
- Social history
- Symptoms
- You can use the computer short cuts of Ctrl+B to bold text, Ctrl+I for italics and Ctrl+U for underline
- Repeat as necessary to create your full notes
- Click Save
Diagnosis
- Click Diagnosis from the Add option

- Complete the details (mandatory sections marked with *):
- Select diagnosis* – start typing in the medical diagnosis e.g. anaemia and pick from the ICD10 options, which often use Americanised spellings (e.g. localized)
- Specify date – if you know the date the date the diagnosis was made, type it in DD/MM/YYYY format or use the calendar date picker
- Click Update
Prescriptions
- Click Prescriptions from the Add option

- See our separate guide
Adding clinical notes outside an appointment
There may be time where you need to add further notes and details to a patient’s record outside an appointment.
- On the dashboard, click Patients to view your list and use the search box at the top to find the patient you want
- Click the three dots at the end of row and then click View patient
- Click Click here at the top of the page to open the Consultation notes section

- Enter # to display your options from a choice of:
- Additional notes
- Additional questions
- Assessemnt
- Chief complaint
- Diagnosis
- Family history
- Follow up
- History of present illness
- Image
- Instructions
- Past medical history
- Past medication
- Past surgical history
- Physical examination
- Plan
- Presenting complaint
- Review of systems
- Social history
- Symptoms
- You can use the computer short cuts of Ctrl+B to bold text, Ctrl+I for italics and Ctrl+U for underline
- Repeat as necessary to create your full notes
- You can also upload documents and images by using drag and drop or clicking Browse for file.
- Click Save
Adding a Care Pathway
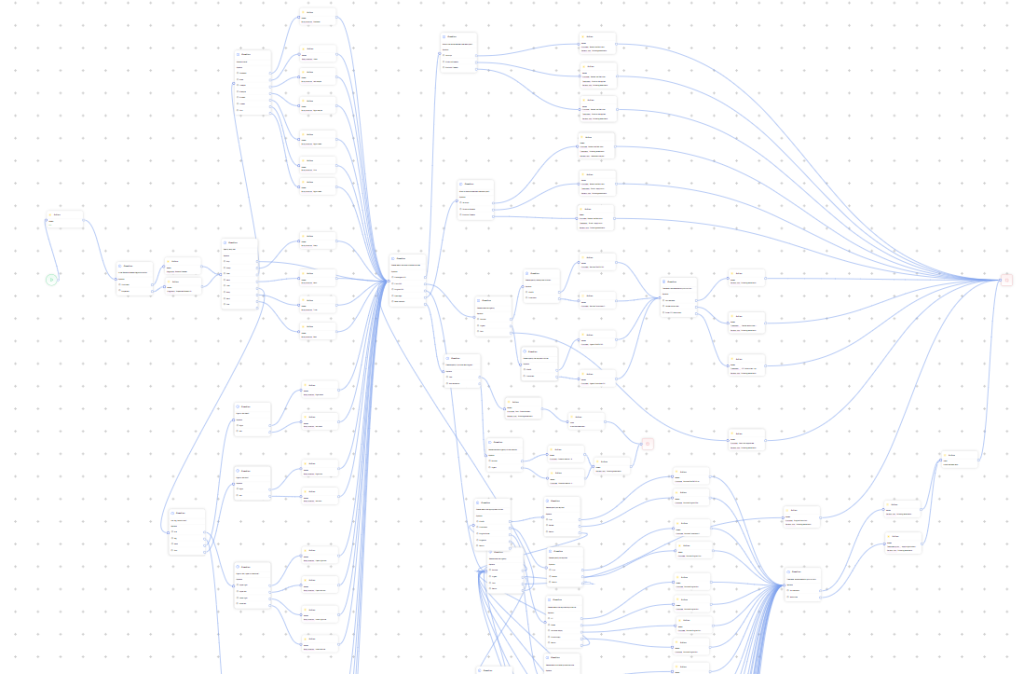
A Care Pathway is a handy workflow that helps you and your team through each step of a patient’s care. It’s made up of questions and prompts to make sure the right care happens at the right time, every time. You’ll need to spend some time thinking about the pathways you need and how you want to use them before setting them up – map them out carefully, making sure they’re evidence-based for your patients and your practice They can be simple or extremely complicated with multiple branches.
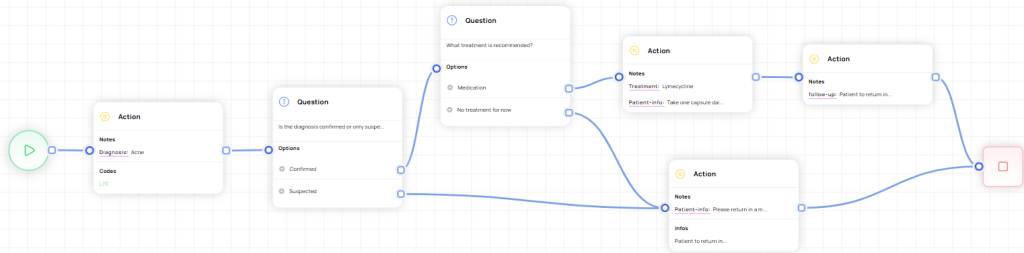
Here’s a quick overview:
After logging into ePractice, click the Care Pathways icon in the left-hand menu.

- Click New
- The nodes you use to build your pathway are on the left of the screen

From top to bottom:
- Start Node – use this to start building your flow
- Question Node – use this to add questions, with a range of answers leading to the next step
- Actions Node – use this to add notes, codes and info
- Stop Node – you can have multiple paths in your flow depeding on the complexity, but each much end with its own stop
- Navigation and other tools are in the bottom right

- Name your pathway by clicking on the pencil icon at the top of the page, then click the tick to save

- Left click and drag the Start Node onto the page to begin
- Left click and drag either the Question or Action Node next to the start, depending on your pathway
- Once you’ve dropped the node you can move it around the screen using background grid as a guide, then join it to your Start Node
- Hover your mouse over the square until you see a + symbol
- Left click then drag your mouse over the circle icon until you see a + symbol
- Let go to add a linking line
- To delete the link click the linking line until it turns green, then click delete


- Right click the Question or Action Node to add the info associated with it:
Question Node
- Type a relevant question into the box at the top of the screen
- Click Add choosing a type from the drop-down options
- Text
- Body location
- Treatment
- Outcome
- Regimen
- Medication
- Type in your answer option and click the small green tick to save
- Repeat as necessary
- Click Save
- Click Confirm
Action Node
- You have the following options and can add as many under each section as you require
- Notes – choose the type from the drop-down options and click the small green tick on the top right of the note to save
- Patient-info
- Diagnosis
- Body Location
- Treatment
- Follow-up
- Outcome
- Codes – type your ISC, CCSD or ICD-10 code into the search bar
- Info
- Notes – choose the type from the drop-down options and click the small green tick on the top right of the note to save
- Click Save
- Click Confirm
- To delete a node, right click and click the x in the top right corner

- Continue adding Question or Action Nodes as necessary – at the end of each path, always add a Stop Node
- Click the padlock icon in the bottom right to lock your layout (unlock before making changes)
You can now test your flow by clicking Run in the top right-hand corner – this’ll open the Clinical Notes section on the right and list your flows on the left. Click on the required response or use the keyboard and click Previous at the bottom of the page to change your answer.
As you build your library Care Pathways will be shown in alphabetical order (left to right, then top to bottom), with the total number indicated in the right-hand corner. You can easily find one by typing any part of the name into the search box at the top.
Editing a Care Pathway
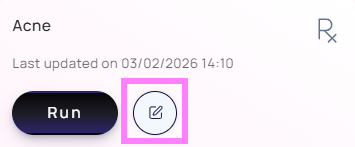
After logging into ePractice, click the Care Pathways icon in the left-hand menu and find the pathway you want to edit. Simply click the Edit icon – you can change everything from the name to the whole flow, but you can’t delete a flow.
Assigning a Care Pathway to a patient
You can only add a Care Pathway from the clinical notes section of a booked appointment – this can be done at the time or retrospectively. There are two ways to open this:
- Click the patient’s name on the diary, then then either click View patient at the top of the right-hand pane or the Add clinical notes icon in the Appointment info section

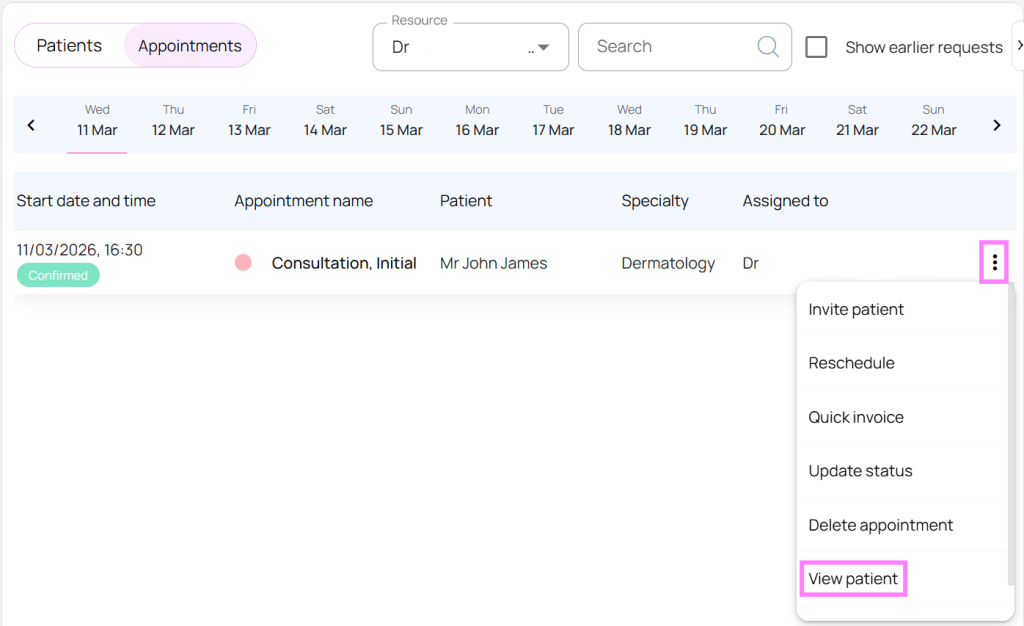
- Click the three dots from Dashboard > Appointments and then click View patient
- Click Clinical notes and look for the relevant appointment
- Click Care pathways from the Add option

- Select from your list of pathways, either by scrolling down or using the search box
- Start the pathway
Adding a task
You can add a task from one of five areas by:
- Clicking Add task from the top right corner on the Dashboard
- Clicking the Tasks icon in Accounts
- Clicking the Tasks icon in Electronic patient records
- Clicking the three dot menu next to a patient’s name on the Dashboard and then clicking Add task
- Clicking Tasks directly within a patient’s record
It now works in the same way, however you get there.
Click Add task and then complete the details – mandatory fields are marked with an asterisk:
- Patient – if adding from the main Tasks screen (from Accounts or Electronic patient records) search for the patient the task relates to – this will be pre-populated if adding directly from the patient’s record; you can leave this blank if you’re adding an general task not linked to a specific patient
- Assigned to* – assign it to any user on the site listed on the drop-down menu
- Task type* – choose from the predefined list, which each user switches on from Electronic patient records > Settings > Practice settings > Task settings**; the options are:
- Admin
- Arrange follow-up
- Chase money due
- Credit Control
- Diagnosis query
- Invoice
- Medication query
- Patient query
- Personal
- Phone call
- Reminders
- Test result query
- Priority* – select from the drop-down options
- High
- Medium
- Low
- Notes – add optional notes or instructions
- Follow-up date* – choose from the calendar picker
**Some task types and visibility may also require user privileges to appear.
Click Save. That task will now appear on the main Tasks dashboard, which defaults to all users and all open tasks, and under the specific patient’s task history.
Managing a task
The quickest way to get to your personal tasks is from the Dashboard. Scroll down the page to the Open tasks pane. You’ll see a scrollable list of all open (incomplete) tasks and you can toggle on the filter to only show yours. From here you can edit or delete the task by clicking the three dot menu next to it.

To view all tasks, both complete and incomplete, click the Tasks icon from the left-hand menu –

from here you can view the patient, edit or delete the task, again by clicking the three dot menu. Use the search function and the task type and status filters at the top of the screen to narrow down the selection. You can also click on any of the column headers to sort (A-Z or Z-A). Any task that has passed the follow-up date is red flagged and completed tasks are green ticked.
- Click Edit to open the required task
- You can change any of the details, apart from the patient the task is linked to
- If the task has been completed, toggle on the is Complete button
- Click Update
- Changes are immediately updated across the site
Although you can delete a task,. remember that this will remove it entirely from the site
If you need more help with EPS, you can sign up for a free 1-2-1 Healthcode Academy training session or get in touch with one of our friendly team.